Background
A year or so ago, I saw a neat project on Kickstarter — TEKE, an LED tube that was controllable with your phone. Despite the fact that many of these products already exist on the market, I decided to back the project.
A year later, the tubes arrived. They are well-built, with a high quality anodized extruded aluminum chassis and a thick plastic lens. The circuit board also seems to be well designed – almost overdesigned, with an ESP32 powering the tubes and offering wifi and bluetooth connectivity.
There are a few signs of cost-saving measures here: the LED light source is a single strip of 60 SK6812 RGBW LED pixels, and the power source is just two 18650 lithium-ion cells arranged in series. Considering the size of the tube, there was certainly room for additional batteries.
The Problem
However, probably the largest downfall is the stock firmware and app. The TEKE tubes operate as Wireless ART-NET (DMX over network) light fixtures. It turns out, wifi is just not a great medium for transmitting 40 frames of lighting data every second. The tubes stutter and lag, and absolutely saturate a wifi connection due to the timing requirements of the data.
The app is not much better. At 300mb, it is a chonky boi and I sure hope you don’t ever have to download this in the field. Due to the nature of the tubes, the app must be running in the foreground at all times in order to send out the ART-NET packets. If the phone goes to sleep or the app is shut down, the tubes stop animating.
The tubes also do not work unless connected to a wifi router, making them difficult to use in the field.
Theoretically, you could control these tubes via any ART-NET compatible software, but this is not practical, especially in the field.
The Solution
WLED is an open-source project to provide excellent control software for LED strips. It features a rich web UI, a native app, support for DMX and sACN, Alexa integration, local control, and more. Best of all, it also runs entirely on the microcontroller attached to the LEDs, not even requiring an app at all.
I’ve forked the stock WLED project to add the needed configuration changes to make TEKE work, including power control, button support, as well as reading out the battery.
Installation Guide
You will need:
- 3.3V FTDI cable
- Some jumper wires
- Visual Studio Code and Platform IO, or the ESP32 flashing software
- T8 screwdriver
- Small Philips screwdriver
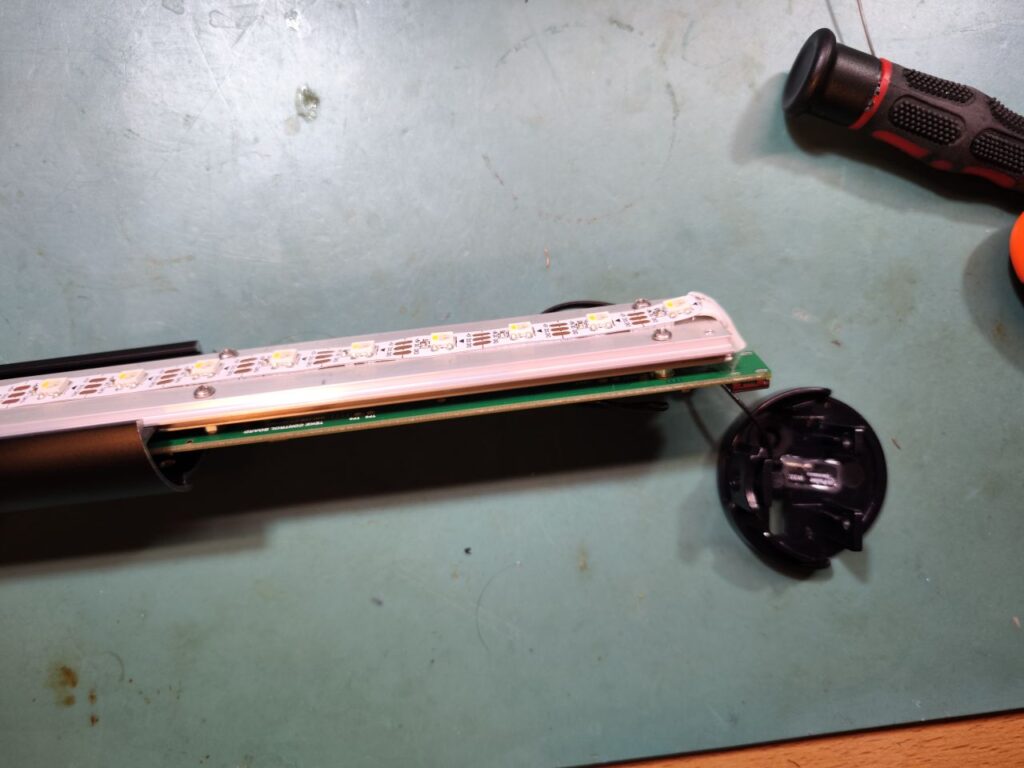
Step 1: Open the TEKE Tube
On the side with the charge port, remove the black screw on the bottom of the plastic end cap.
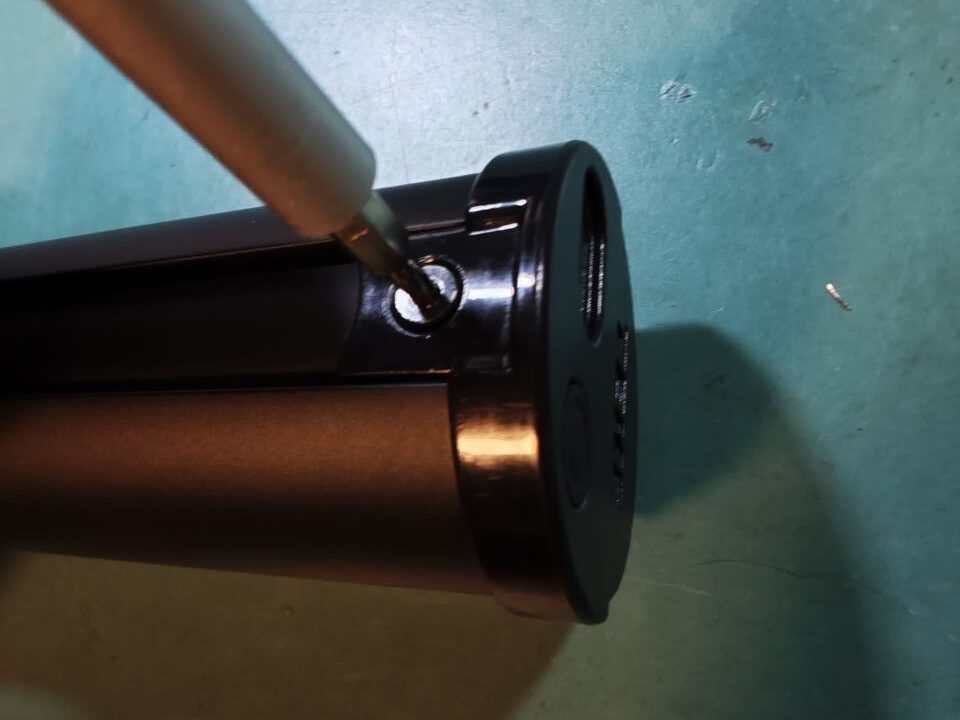
Gently squeeze the plastic lens where it meets the case and remove, it should pop out with very little effort.
Remove the two screws connecting the end cap to the aluminum holder.
Remove the same two screws on the other end of the tube.
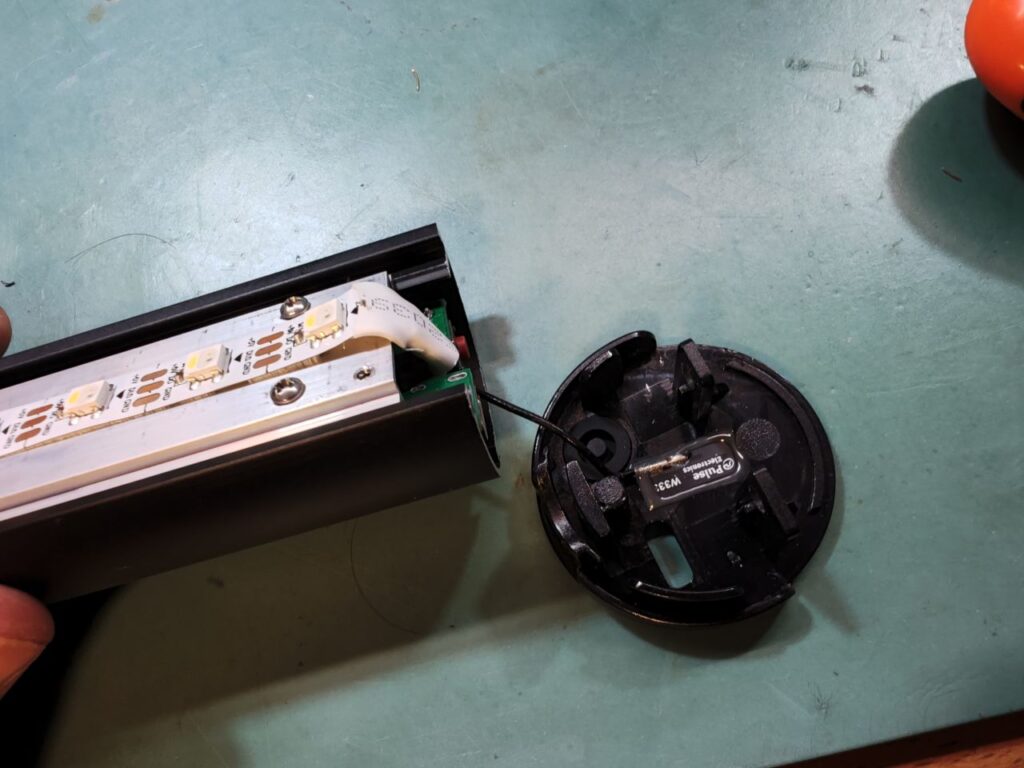
Remove the plastic end cap from the charge port side. You don’t need to remove the other side. Do this carefully, as there is a Wifi antenna glued to the end cap.
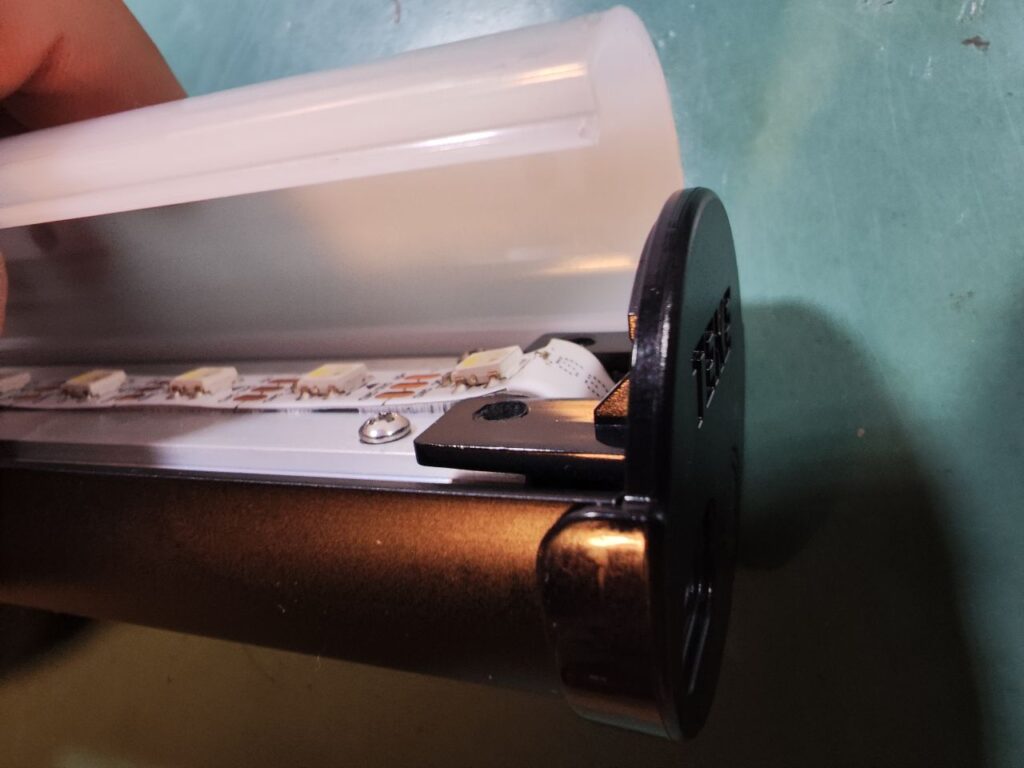
Step 2: Remove the aluminum mounting plate from the tube assembly.
Gently pull on the aluminum until it slides out. You only need to expose it by 6 inches.
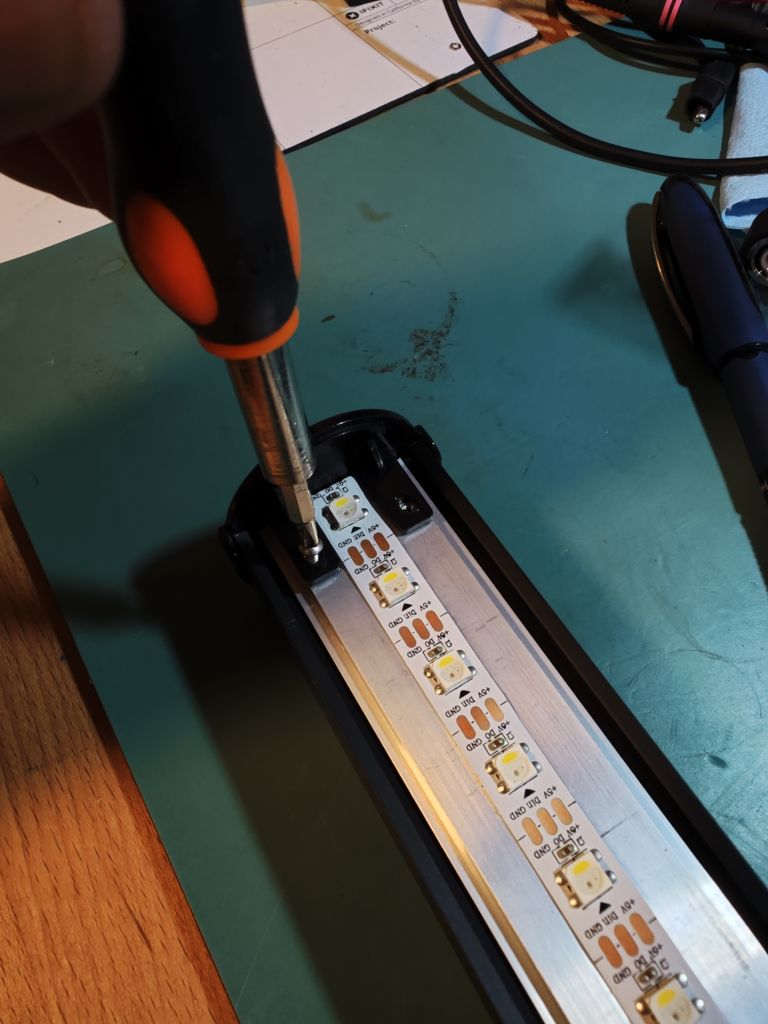
Locate the connector labeled Serial Download. Connect three jumper wires between your FTDI cable as follows:
1: Not connected
2: Yellow
3: Orange
4: Black
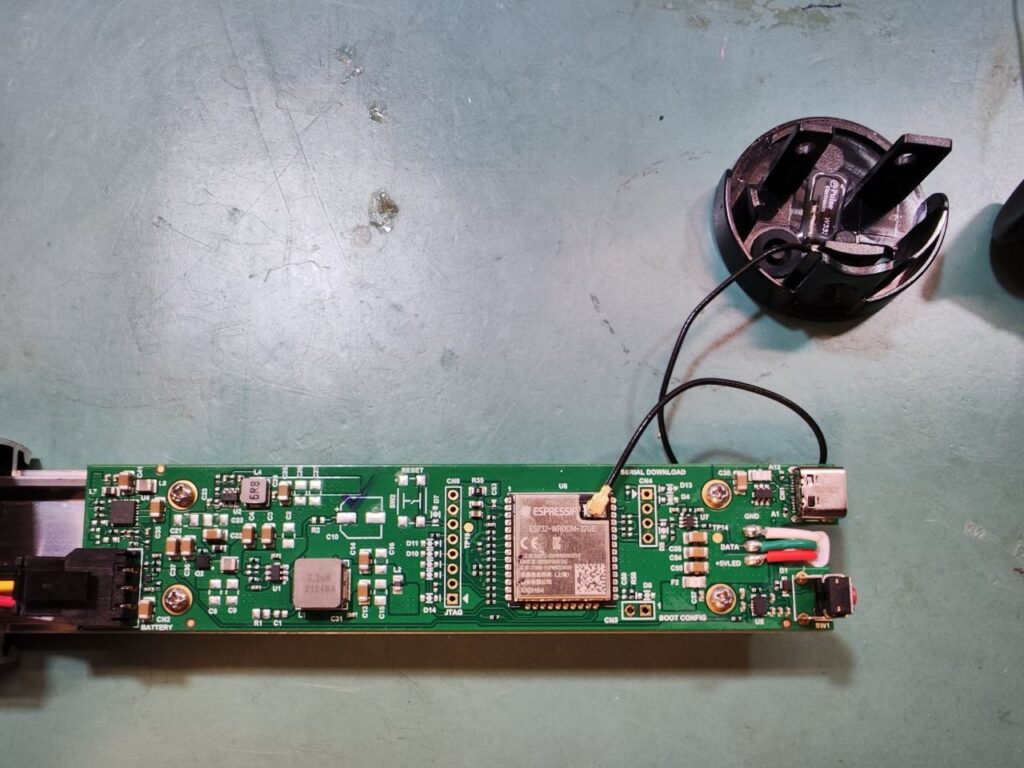
You can just insert these wires into the holes and hold them there with your hand.
Test that the connection is working
Open a serial terminal application (I use Putty) at 115,200 baud and power on your TEKE by holding the power button. You should see some startup messages, and Connecting to Wifi. If you don’t, check your connections.
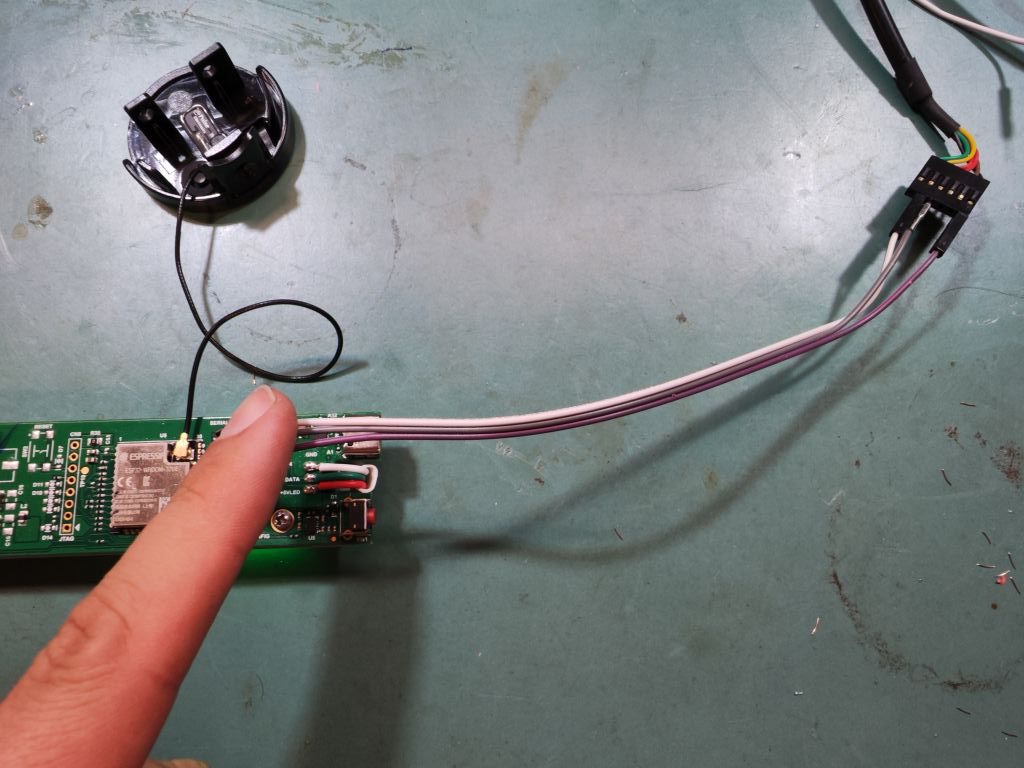
Step 3: Getting the board into Download mode
In order to accept a firmware upgrade, you will need to reboot the ESP into Download mode. This is quite easy since the TEKE developers have left all the needed pins exposed.
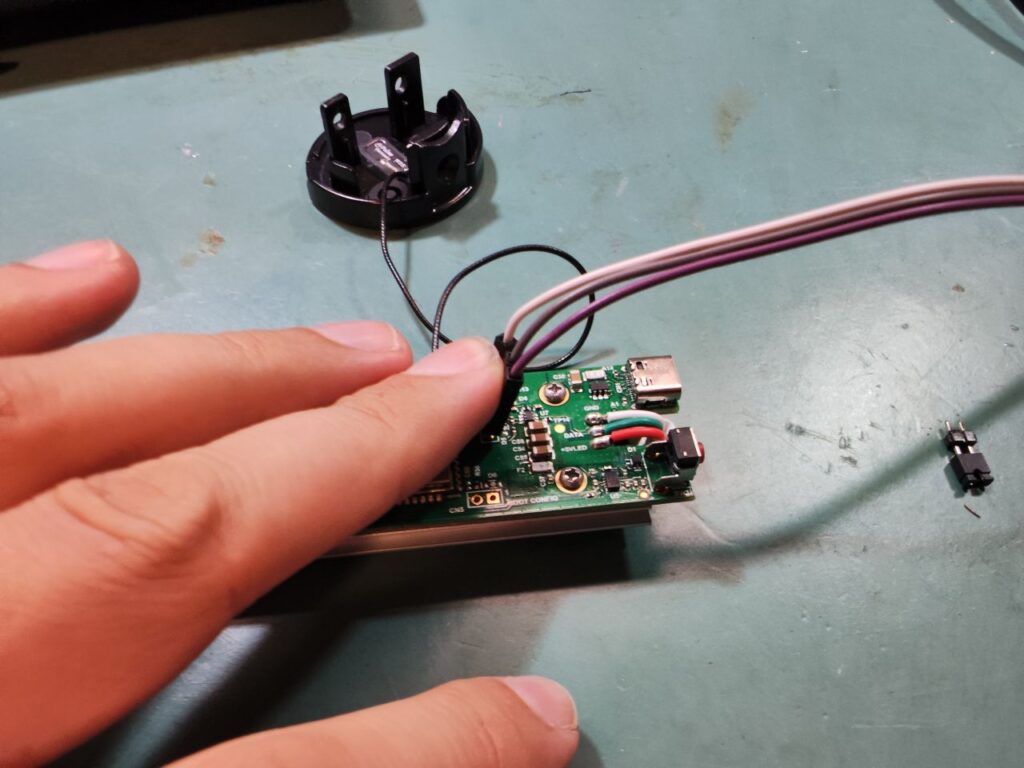
First, bridge the two pins labeled BOOT CONFIG. You can use anything that will short them together.
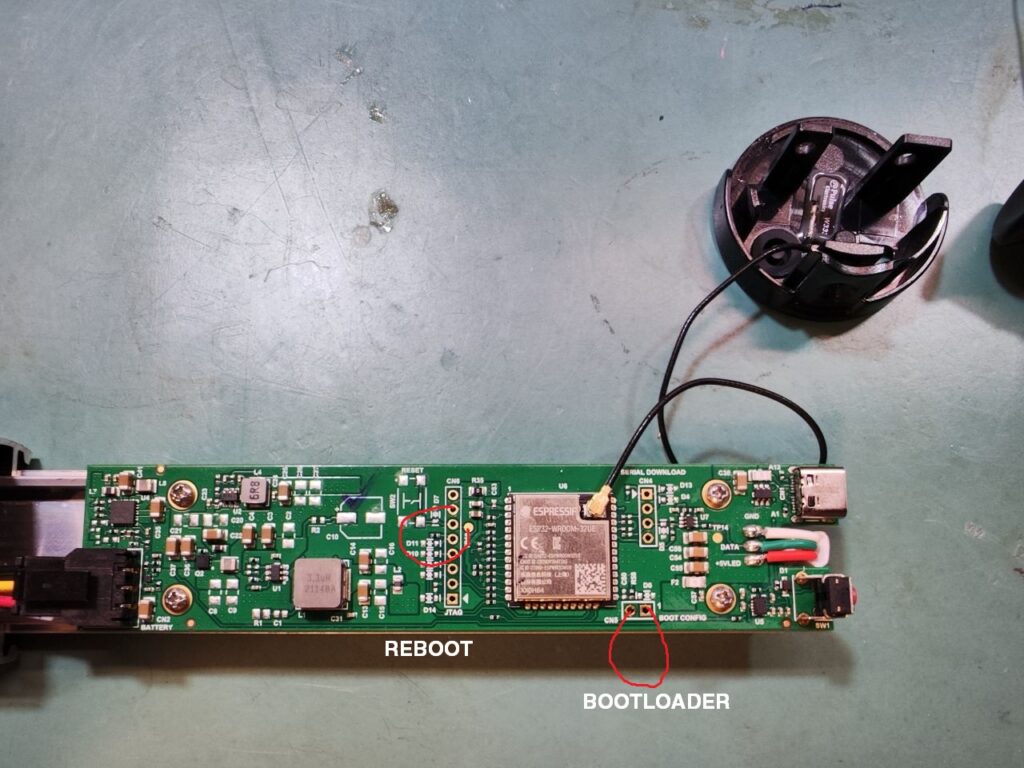
Next, reset the chip. You can do this by shorting TP19 (just to the right of the JTAG connector) to ground. Ground can be found on the 2nd hole from the top on the JTAG connector.
The chip should now be in bootloader mode. If you still have the serial console open, you will see Waiting for Download.
Step 4: Flashing the firmware
Option A: Build from source
Download my fork of the WLED project with the minor changes needed for TEKE from my repository here.
Follow the steps on the WLED Getting Started page to install Visual Studio Code and Platform IO.
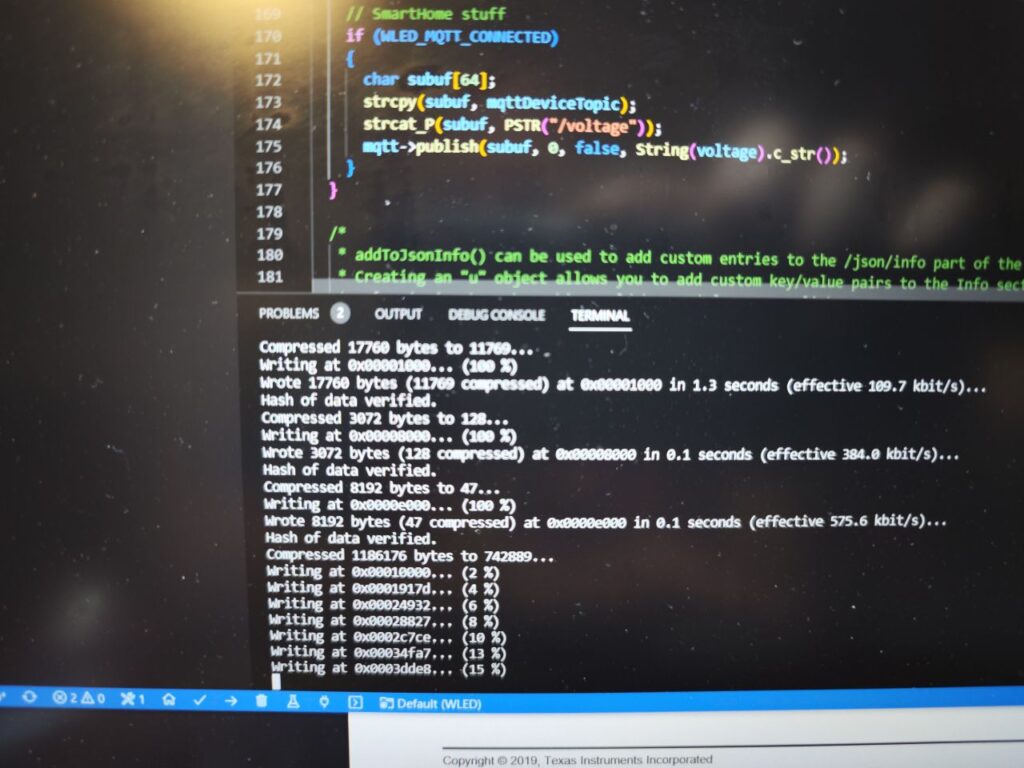
When you are ready to flash, click the little Upload right arrow in the bottom toolbar.
Option B: Flash the pre-built binary
Download the pre-built binary firmware.bin from my Releases page.
Use the ESP32 Flash Tool to flash the board.
Once the Flash is complete, reboot the board again (Remember to remove your jumper from the BOOT CONFIG pins) and you should see some lights!
Step 5: Configure WLED’s Network
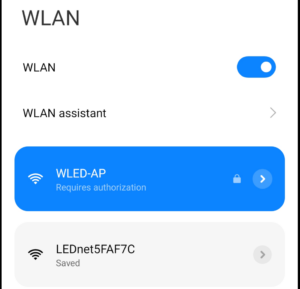
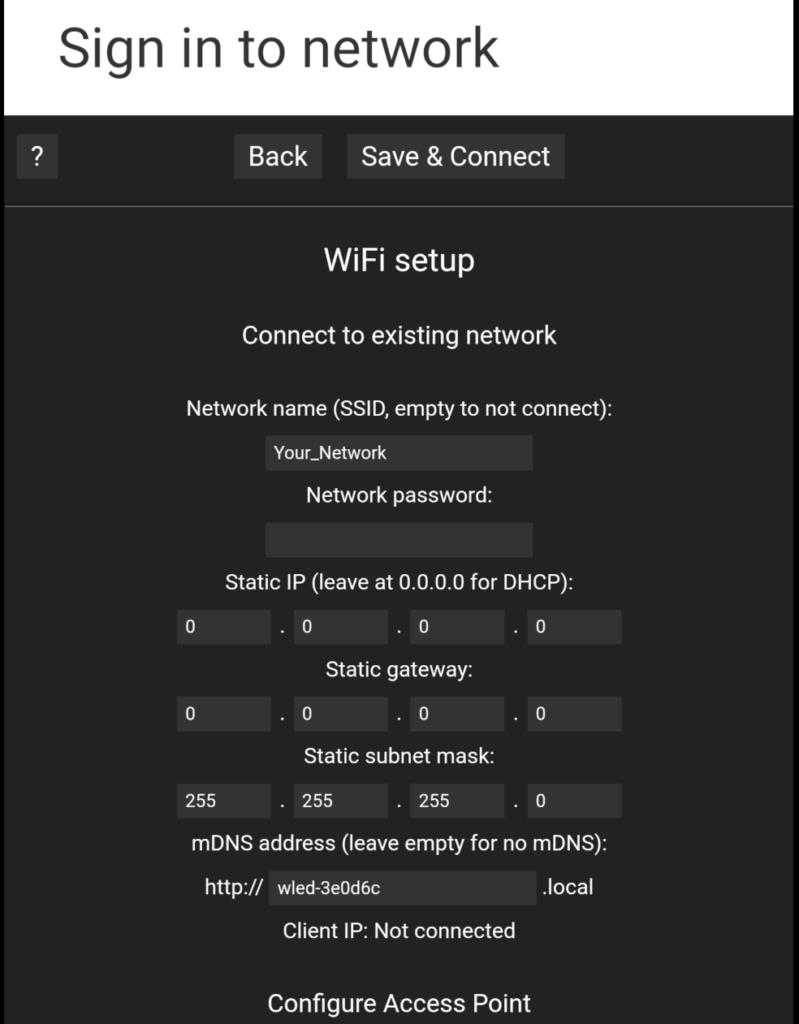
Use your phone to look for a wifi network named WLED-AP. The default password is wled1234. Connect to it. Your phone should ask you to sign in, and take you to the WLED configuration page. Put in the details of your WIFI network.
Once the TEKE has rebooted, use the + button to Discover the WLED and connect to it.
Step 6: Configure your LEDs
Click Setup, then LED Preferences. Most of the defaults should already be correct, but you will need to change a few things:
- Set LED type to SK6812 WRGB
- Set Length to 60
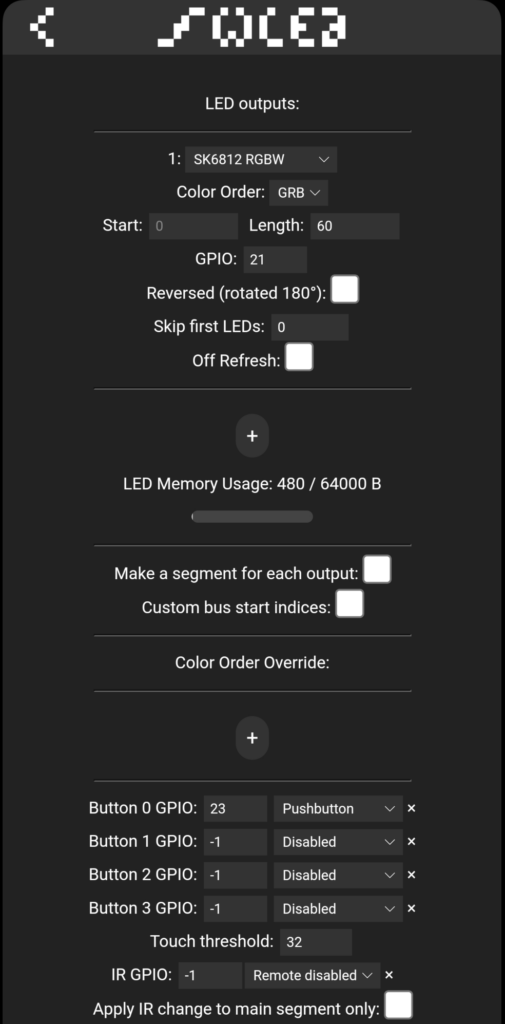
That’s it!
All done!
Your TEKE should now operate like any WLED-controlled LED strip. Enjoy the more capable functionality!
Operating
The TEKE has only one button, and it is available in WLED as Button 0. By default it has the following functions:
- Short press: A quick click
- Medium press: About 1/3 of a second
- Long press: About a second
- When off:
- Medium press to turn on.
- When on:
- Short press to cycle LED power (while leaving Wireless enabled)
- Medium press to cycle preset colors
- Long press to turn off all power, including wireless. Use this when you are done with the tube for the day.
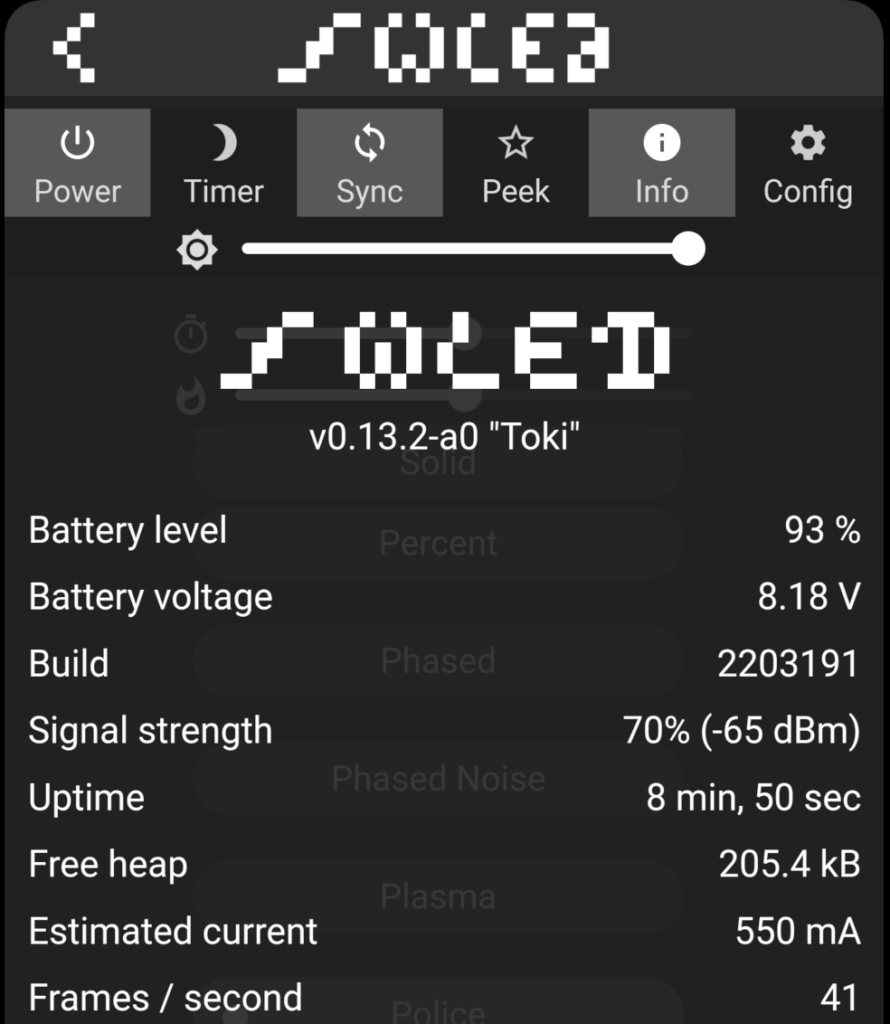
To check the battery, click Info
Troubleshooting
If you have problems, some tips might help:
- LED Pin must be set to pin 21
- Relay Pin must be set to pin 2
- If you don’t see battery stats at all when you click Info, you may not be running my build
Demo
Thanks
Thanks to LoialOtter for some help with the circuit!
Appendix
TEKE PinoutsS
- GPIO0: Bootloader mode
- GPIO1: Serial RX
- GPIO2: Power enable. Must be HIGH to power LEDs.
- GPIO3: Serial TX
- GPIO23: Power button
- GPIO27: Enable battery read. Turns on the circuit that reads the battery voltage
- GPIO32: Charge enable. Must be low to enable battery charging
- GPIO33: Battery voltage analog input. Used with GPIO27
Adding extra buttons
If you would like to add extra buttons (WLED supports up to 4 with no firmware changes), you can use the JTAG connector. The following extra pins are unused by the TEKE:
- 2nd from bottom: GPIO12
- 3rd from bottom: GPIO13
- 4th from bottom: GPIO14
Simply connect your button in such a way that it shorts the chosen pin to ground, and configure it in the LED Preferences page in WLED.
A note about the Battery measurement
TEKE performs battery measurements by using the ADC to guess the voltage of the battery. I am not sure if the algorithm I selected is the best, and I also don’t know the min and max voltage ranges. So I would use the battery and voltage display as a grain of salt.


1 Comment
Delta · September 12, 2023 at 11:29 am
Wow I just got these from a friend because he bought them but hates the software.
I am working since ages with wled and LedFX.
Thanks for this guide!!!
Comments are closed.